WebEx Instructions for DEN Instructors
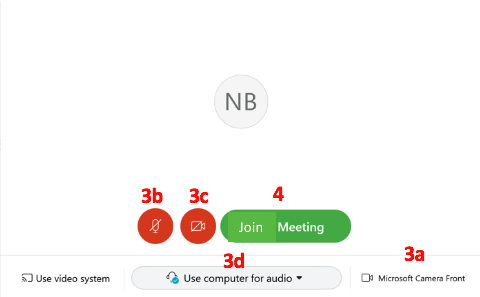
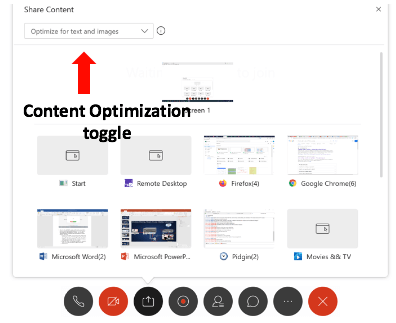
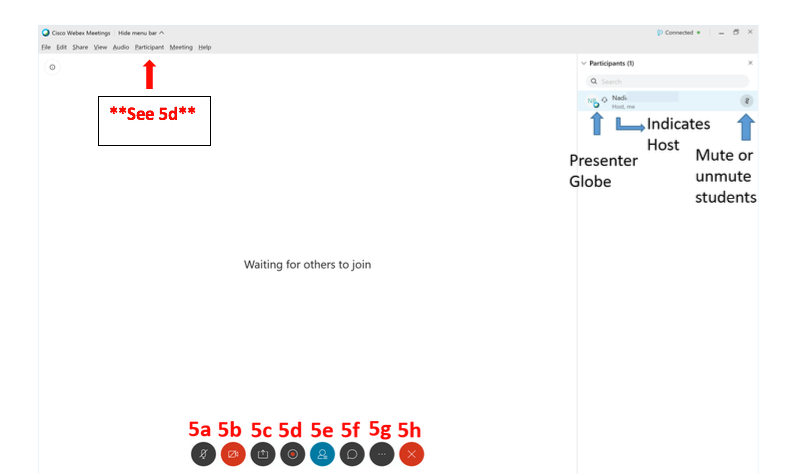
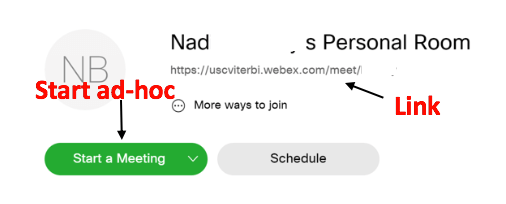
If you are teaching a DEN course in Desire2Learn remotely, please follow these steps.
Steps:
WebEx Instructions for non-DEN ONLINE Instructors
These step-by-step instructions are for non-DEN instructors who teach only ONLINE sections (and have not been assigned a DEN classroom). We will also provide a set of best practices that will also aid in facilitating your course online through WebEx. Please contact the Instructional Support Center if you'd like to set up a quick online demo with WebEx.
Steps:
WebEx Instructions for iPad
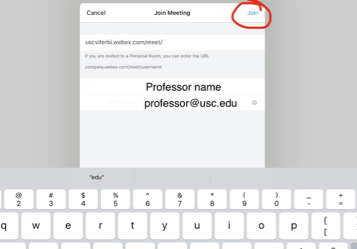
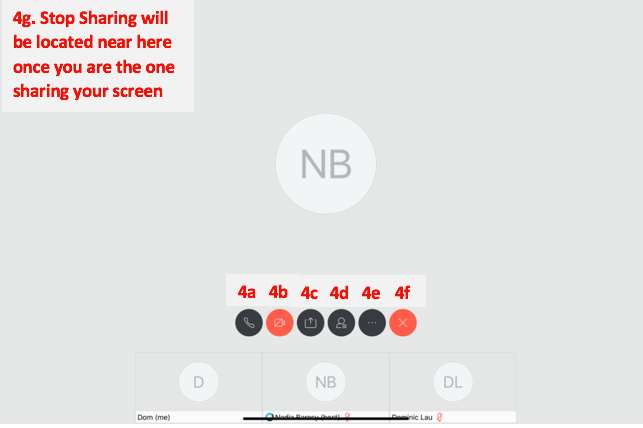
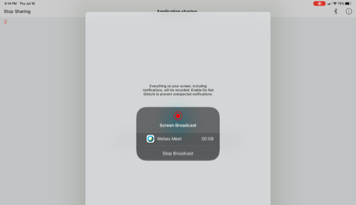
For instructors using an iPad, please follow these instructions.
Steps:
Best Practices for Faculty who are Teaching with WebEx
Students
This may be the first time that students are accessing the course online through WebEx as well, so there will be some initial troubleshooting that the student may need to go through in order to get their system set up properly for participating in your class via WebEx. Here are the most common issues that occur with troubleshooting steps:
- Troubleshooting Meetings
- Connect to Audio and Video in a WebEx Meeting
- WebEx Audio Troubleshooting
- Have the students join a test meeting to make sure WebEx is properly installed
Audio
- Join from quiet place - if you have a very noisy background, students will struggle to hear you clearly, so try to join from a quiet location.
- Mute yourself if not speaking - Muting your audio is a good way to prevent unwanted sound from environment disturbing the meeting. Sounds such as keyboard strokes, breathing, and background chat may be more audible to other participants than you realize. Click or tap your microphone icon to mute.
- Use a good headset - The best audio experience is achieved with a good internet connection and a good quality headset. Earphones can be used but tend to pick up a lot of background noise, so they are not recommended. When using a headset, place the microphone in front of your chin, not in front of your mouth, to avoid heavy breathing sounds.
Video
- Find your light - Good lighting can make all the difference: too much light behind can make you look like you're in witness protection, whilst too much light in front can wash you out or create strange shadows. Get it just right by adjusting your curtains or blinds and having a warm light on your desk.
- Get your angles right - Position your camera just above eye level. This gives a warm, open look. You might also want to place the camera slightly left or right from your face so that you appear from your favorite angle.
- What's behind you - Think about what's behind you and in the view of the camera. Clear the clutter and create a backdrop that the people you are meeting with will enjoy seeing.
Writing and WebEx
We realize that in a normal classroom you can either use a SMARTboard or notepad to write. There are some ways you can still write and attendees can see what you are writing.
- Use a Tablet PC or iPad - Both devices allow for screen sharing.
- Recommended Tablet PC apps: Microsoft OneNote, PDF Annotator, MS Word and PowerPoint all allow for annotation/writing.
- Recommended iPad app: Notability is our #1 recommended iOS app. Works with WebEx and Screen Sharing
- USB document camera - our office may be able to provide you with a USB document camera. This will allow you to still use a standard notepad and pen. Please contact our office for immediate support.
Easily Schedule Virtual Office Hours
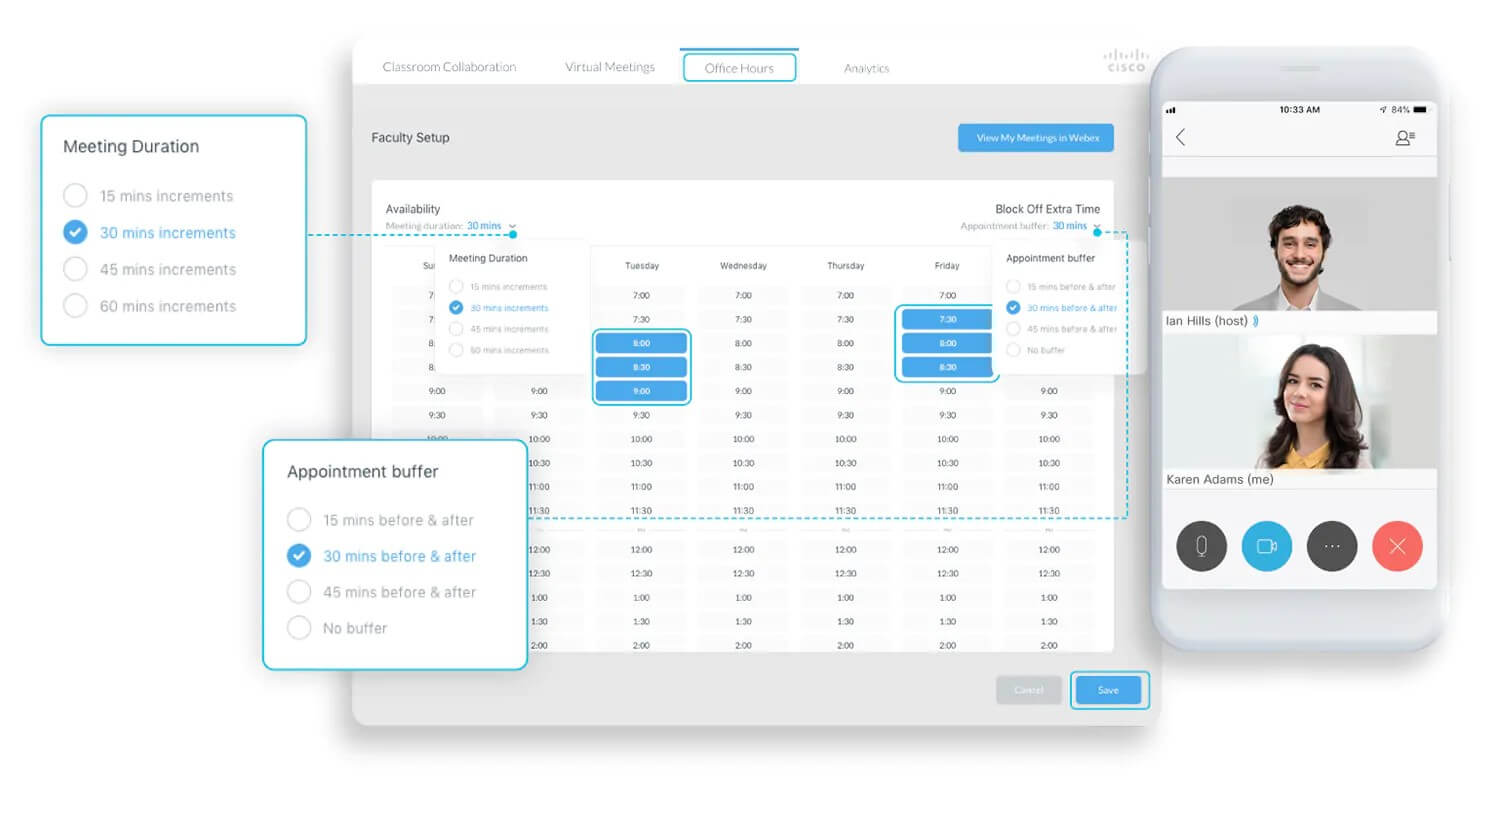
With our new Webex integration, you can easily schedule office hours for your class. Your students can see a list of available times and select one. You will get an email with the meeting link and see the meeting in your Upcoming Meetings list, and that appointment slot is no longer available to anyone else.
- In the course main menu, click on Virtual Meetings. Go to the Office Hours tab.
- Set the meeting duration. Go to the drop-down under availability and select the desired minute increment (15, 20, 30, 45, or 60 minutes)
- Set the appointment buffer. This is there in case your office hours runs over or you need breaks between meetings
- Select the days of the week and times you want to host office hours. The blocks of time are then highlighted.
- Scroll down and select Save.
Tips and tricks for the host
In the event that you are the host you have access to moderate and manage the meeting.
- Record meetings to share with people who couldn't attend
- Mute other participants when there is unwanted noise
- Get there at least five minutes early - this will give you time to join and prepare for your meeting
- Turn your video on - video makes for a much more immersive experience for the attendee.
- Poor connectivity? Top tips for dealing with poor connectivivity:
- Switch to a phone connection easily when using the computer for audio.
- Switch the webcam off
- Share a file or a whiteboard instead of the screen.


